So, you've got this tiny Raspberry Pi sitting on your desk, and you're thinking, "How the heck do I access it from anywhere in the world?" Well, my friend, you're in the right place. Accessing your Raspberry Pi with a public IP is totally doable, and we're about to break it down step by step. Whether you're a seasoned tech guru or just starting out, this guide has got you covered. Let's dive in and turn your little Pi into a global powerhouse.
Imagine being able to control your home automation system, check your security cameras, or even run a personal server—all from the comfort of your phone while sipping coffee in Paris. Sounds cool, right? That's the magic of setting up your Raspberry Pi with a public IP. In this article, we're going to explore how to make this dream a reality, covering everything from basic setup to advanced configurations.
Now, before we get into the nitty-gritty, let's address the elephant in the room: security. Opening up your Raspberry Pi to the world comes with risks, but don't worry—we'll show you how to stay safe while still enjoying the benefits. So, grab a snack, get comfy, and let's embark on this tech adventure together!
- Hdmovie2black The Ultimate Guide To Streaming Movies Online
- Unveiling The Truth About Kristi Noem Height A Comprehensive Guide
Why Access Raspberry Pi with Public IP?
First things first, why would anyone want to access their Raspberry Pi using a public IP? Well, there are tons of reasons! Whether you're building a home server, running a media center, or creating a smart home hub, having remote access to your Pi can save you a ton of time and hassle. Plus, it's just plain cool to be able to control your devices from anywhere in the world.
Advantages of Remote Access
- Monitor and manage your home automation systems remotely.
- Access files and data stored on your Raspberry Pi from any location.
- Run a personal web server or cloud storage solution that's accessible globally.
- Enhance your cybersecurity by monitoring logs and activity from afar.
But hey, let's not sugarcoat it—there are challenges too. Security risks, potential downtime, and the need for proper configuration can all be roadblocks. That's why we're here to guide you through it all.
Understanding Public IP and Its Role
Before we dive into the setup process, let's take a quick detour to understand what a public IP is and why it's crucial for remote access. Simply put, a public IP is like your house address on the internet. It allows other devices to find and connect to your Raspberry Pi from anywhere in the world.
Now, here's the thing: not all internet connections come with a public IP. Many ISPs use NAT (Network Address Translation) to assign private IPs to their customers. This means you might need to jump through a few hoops to get your Pi online. Don't worry, though—we'll cover all the tricks and tips to make it happen.
Public IP vs. Private IP
Let's clear up the confusion between public and private IPs. A private IP is like your apartment number—it's only visible within your local network. A public IP, on the other hand, is like your street address—it's visible to the entire internet. For remote access, you'll need a public IP, but if your ISP doesn't provide one, we've got solutions for that too.
Setting Up Your Raspberry Pi for Remote Access
Alright, let's get our hands dirty and set up your Raspberry Pi for remote access. This section will walk you through the entire process, from initial setup to final configuration. Buckle up, because we're about to get technical!
Step 1: Install the Necessary Software
First, you'll need to install a few key pieces of software on your Raspberry Pi. This includes SSH (Secure Shell) for remote access and possibly a web server if you're planning to host websites or services. Here's a quick rundown of the steps:
- Enable SSH in the Raspberry Pi Configuration tool.
- Install a web server like Apache or Nginx if needed.
- Update your Pi's software to ensure everything is up to date.
Remember, security is key here. Make sure to change the default SSH credentials and consider using key-based authentication for an extra layer of protection.
Step 2: Find Your Public IP Address
Next, you'll need to find your public IP address. There are several ways to do this, but the easiest is to simply visit a website like whatismyip.com. Once you have your public IP, jot it down—you'll need it later.
If your ISP doesn't assign a public IP, consider using a service like No-IP or DuckDNS to create a dynamic DNS entry. These services will give you a hostname that points to your Pi, even if your IP changes.
Configuring Port Forwarding
Now that you've got your Pi set up and your public IP handy, it's time to configure port forwarding on your router. This step allows incoming traffic from the internet to reach your Raspberry Pi. Here's how to do it:
Accessing Your Router's Settings
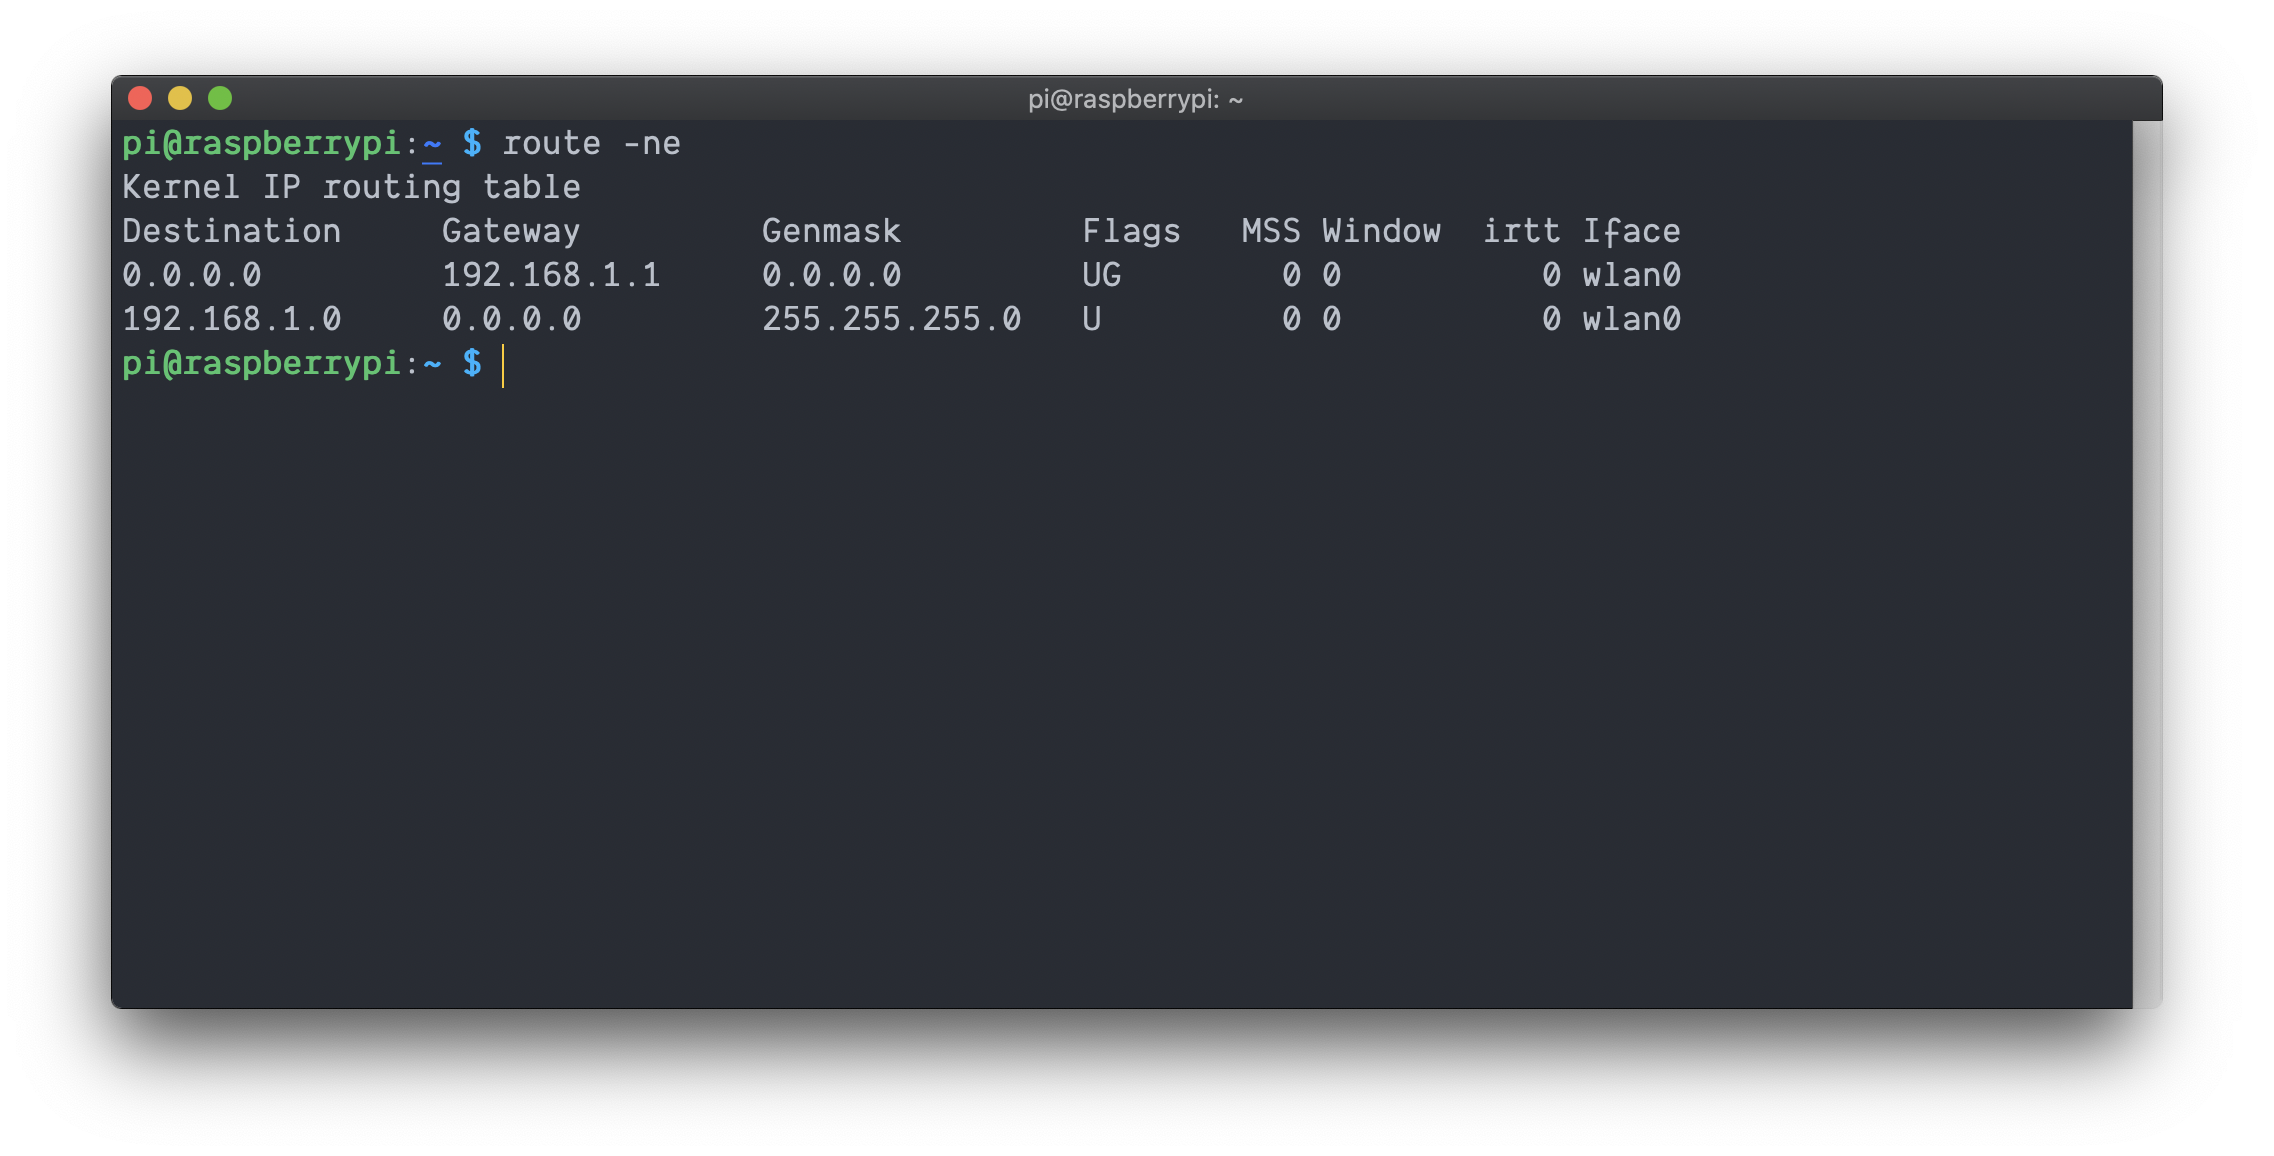
Every router is a little different, but most will have a web interface where you can configure port forwarding. Log in to your router using its IP address (usually something like 192.168.0.1) and navigate to the port forwarding section.
Once there, create a new rule that forwards traffic on the desired port (usually port 22 for SSH) to your Raspberry Pi's local IP address. Make sure to save your changes and restart the router if necessary.
Securing Your Raspberry Pi
With great power comes great responsibility, and that's especially true when it comes to remote access. Here are a few tips to keep your Raspberry Pi secure:
- Use strong, unique passwords for all accounts.
- Enable a firewall to block unauthorized access.
- Regularly update your Pi's software to patch vulnerabilities.
- Consider using a VPN for an added layer of security.
Remember, security is an ongoing process. Stay vigilant and keep an eye on your logs for any suspicious activity.
Using SSH Keys for Authentication
One of the best ways to secure your Raspberry Pi is to use SSH keys instead of passwords. This method is more secure and eliminates the risk of brute-force attacks. Here's how to set it up:
- Generate an SSH key pair on your local machine.
- Copy the public key to your Raspberry Pi using the ssh-copy-id command.
- Disable password authentication in the SSH configuration file.
Trust me, the extra effort is worth it. SSH keys are one of the simplest and most effective ways to protect your Pi.
Advanced Configurations
Once you've got the basics down, you might want to explore some advanced configurations to get the most out of your Raspberry Pi. Here are a few ideas:
Setting Up a Reverse Proxy
A reverse proxy can help you manage multiple services on your Raspberry Pi and provide an extra layer of security. Tools like Nginx or Caddy can handle this task with ease. Just configure the proxy to route traffic to the appropriate services based on the requested URL.
Using a Dynamic DNS Service
If your public IP changes frequently, a dynamic DNS service can keep your hostname up to date. Services like No-IP and DuckDNS offer free plans that are perfect for hobbyists and small projects.
Troubleshooting Common Issues
Even the best-laid plans can go awry, so let's talk about some common issues you might encounter and how to fix them.
Connection Refused Errors
If you're getting a "connection refused" error, double-check your port forwarding settings and make sure the SSH service is running on your Pi. You might also want to verify that your firewall isn't blocking incoming traffic.
IP Address Changes
Dealing with a changing public IP can be frustrating, but dynamic DNS services can help. Just make sure to configure your router or Pi to update the DNS entry automatically whenever your IP changes.
Conclusion: Take Control of Your Raspberry Pi
And there you have it—a comprehensive guide to accessing your Raspberry Pi with a public IP. From setting up SSH to securing your device, we've covered all the essentials to help you take control of your little Pi from anywhere in the world.
Remember, security is paramount when it comes to remote access. Always use strong passwords, enable firewalls, and consider using SSH keys for authentication. With these precautions in place, you can enjoy the freedom and flexibility of controlling your Raspberry Pi from anywhere.
So, what are you waiting for? Grab your Pi, follow the steps outlined in this guide, and start exploring the possibilities. And don't forget to share your experience in the comments below or check out our other articles for more tech tips and tricks!
Table of Contents
- Aditi Misty Nude Video Separating Fact From Fiction And Understanding The Impact
- Hd Hub4uin Bollywood Your Ultimate Destination For Highquality Indian Cinema