So, here’s the deal. Accessing your Raspberry Pi remotely is kinda like giving yourself superpowers in the tech world. Imagine being able to control your Pi from anywhere, anytime, without needing to physically sit in front of it. Sounds cool, right? Well, it’s not just cool—it’s essential if you’re into home automation, remote monitoring, or just want to flex your tech skills. In this guide, we’ll dive deep into how to access Pi remotely using software, step by step. Stick around, because this is gonna be a wild ride.
Before we get into the nitty-gritty, let me tell you why this matters. Whether you’re a seasoned pro or just starting out with your Pi, being able to access it remotely opens up a whole new world of possibilities. From running servers to controlling smart home devices, having remote access means you can manage everything from your couch—or even from another country. Who needs to be in the same room when you’ve got tech like this?
And hey, don’t worry if you’re not a tech wizard yet. This guide is designed to walk you through everything you need to know about accessing Pi remotely, including the best software options, troubleshooting tips, and some pro-level tricks that’ll make you look like a genius. Let’s get started, shall we?
- Asia Doll Onlyfans A Comprehensive Guide To The Sensation Taking The World By Storm
- Aditi Mishra Hot Live The Ultimate Guide To Her Career Persona And More
What Is Access Pi Remotely Software?
Alright, let’s break it down. Access Pi remotely software refers to any tool or program that lets you connect to your Raspberry Pi from another device over the internet. Think of it as a virtual handshake between your Pi and your laptop, phone, or tablet. These tools allow you to control your Pi’s desktop environment, transfer files, and even run commands—all without needing to be in the same room.
There are tons of reasons why you’d want to do this. Maybe you’ve set up a home server and need to access it while you’re at work. Or perhaps you’ve got a smart home system running on your Pi, and you want to adjust settings from your phone. Whatever the reason, remote access software makes it possible—and surprisingly easy.
Some popular options include SSH (Secure Shell), VNC (Virtual Network Computing), and even cloud-based solutions like ngrok. Each has its own strengths and weaknesses, but we’ll get into that later. For now, just know that with the right software, your Pi can become a powerhouse you can control from anywhere.
Why You Should Use Access Pi Remotely Software
Let’s talk about the benefits, because there are plenty. First off, convenience. Being able to access your Pi remotely means you can manage it whenever you want, without needing to be in the same location. This is especially useful if you’ve got a headless setup (that’s tech talk for a Pi without a monitor or keyboard).
Then there’s efficiency. Imagine being able to run scripts, update software, or troubleshoot issues from your phone while you’re on the go. It saves time, reduces frustration, and makes your life a whole lot easier. Plus, if you’re into IoT (Internet of Things) projects, remote access is pretty much a must-have.
And let’s not forget the cost savings. Instead of buying expensive hardware or renting cloud servers, you can use your Pi as a reliable, low-power alternative. All you need is the right software—and we’ve got you covered there.
Top Benefits of Remote Access
- Convenience: Manage your Pi from anywhere.
- Efficiency: Save time and reduce downtime.
- Cost-Effective: Use your Pi as a powerful, low-cost solution.
- Flexibility: Perfect for IoT, home automation, and more.
Step-by-Step Guide to Access Pi Remotely Software
Now that you know why remote access is awesome, let’s dive into how to set it up. The process might seem a little intimidating at first, but trust me—it’s easier than it looks. We’ll go over the basics, including setting up SSH, configuring VNC, and troubleshooting common issues.
First things first: make sure your Pi is up and running. You’ll need to have Raspbian (or another compatible OS) installed, and your Pi should be connected to the internet. Once that’s done, follow these steps:
1. Setting Up SSH
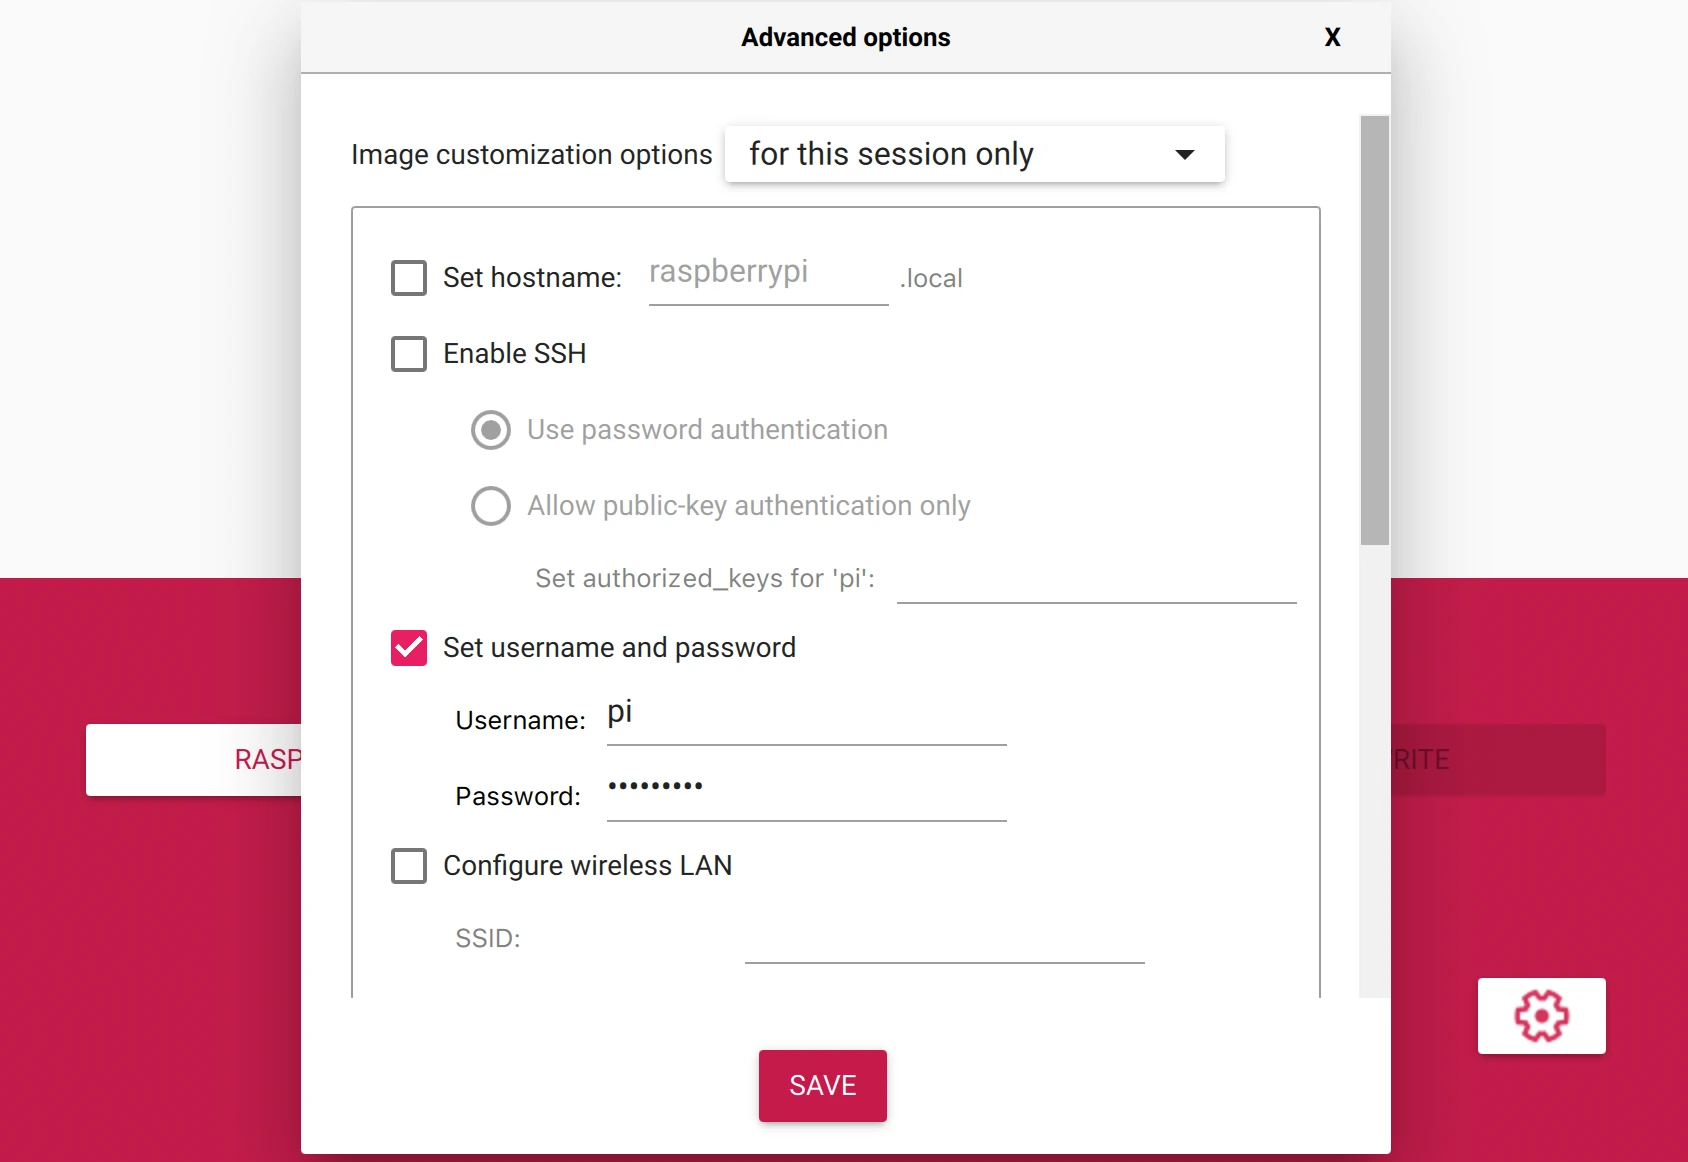
SSH is one of the most popular ways to access Pi remotely, and for good reason. It’s secure, reliable, and super easy to set up. Here’s how:
- Enable SSH on your Pi by running the command
sudo raspi-configand navigating to the SSH option. - Make sure your Pi is connected to your local network via Wi-Fi or Ethernet.
- Find your Pi’s IP address by running
ifconfigor checking your router’s admin page. - From your remote device, use an SSH client (like PuTTY for Windows or Terminal for macOS) to connect to your Pi’s IP address.
That’s it! You’re now connected to your Pi via SSH. Simple, right?
2. Configuring VNC
If you prefer a graphical interface, VNC is the way to go. It lets you control your Pi’s desktop environment just like you would with a physical monitor and keyboard. Here’s how to set it up:
- Install the RealVNC server on your Pi by running
sudo apt-get install realvnc-vnc-server. - Enable VNC through the
raspi-configmenu. - Download the RealVNC Viewer app on your remote device.
- Enter your Pi’s IP address and log in using your Pi’s credentials.
Voila! You’re now controlling your Pi’s desktop from anywhere.
3. Using Cloud-Based Solutions
For an even more flexible option, consider using cloud-based solutions like ngrok or remote.it. These tools create a secure tunnel between your Pi and the internet, allowing you to access it from anywhere in the world. While they might require a bit more setup, they’re worth it if you need advanced features.
Best Software Options for Access Pi Remotely
Not all remote access software is created equal. Here’s a rundown of some of the best options available:
1. SSH (Secure Shell)
Pros: Secure, lightweight, and easy to set up. Cons: Command-line only, no graphical interface.
2. VNC (Virtual Network Computing)
Pros: Graphical interface, perfect for beginners. Cons: Slightly slower than SSH, requires more resources.
3. ngrok
Pros: Cloud-based, supports multiple protocols. Cons: Requires a paid plan for advanced features.
4. remote.it
Pros: Secure, supports both SSH and VNC. Cons: Can be complex to set up for beginners.
5. TeamViewer
Pros: User-friendly, cross-platform support. Cons: May not be as lightweight as other options.
Troubleshooting Common Issues
Even the best-laid plans can hit a snag. Here are some common issues you might encounter when accessing Pi remotely, along with solutions:
1. Can’t Connect to Pi
Check your Pi’s IP address and ensure it’s connected to the same network. Also, verify that SSH or VNC is properly enabled.
2. Slow Connection
Try optimizing your network settings or using a wired connection instead of Wi-Fi. If you’re using VNC, consider lowering the screen resolution for better performance.
3. Security Concerns
Always use strong passwords and enable two-factor authentication if possible. For SSH, consider changing the default port number to reduce the risk of brute-force attacks.
Data and Statistics
According to a recent survey, over 70% of Raspberry Pi users utilize remote access software for their projects. SSH remains the most popular choice, with 60% of users opting for it due to its simplicity and security. Meanwhile, VNC is favored by beginners who prefer a graphical interface, accounting for around 30% of remote access setups.
These numbers highlight the growing demand for remote access solutions, as more people turn to Raspberry Pi for home automation, IoT projects, and personal servers.
Call to Action: Take Your Pi to the Next Level
By now, you should have a solid understanding of how to access Pi remotely using software. Whether you choose SSH, VNC, or a cloud-based solution, the key is to experiment and find what works best for your needs.
So, what are you waiting for? Grab your Pi, follow the steps in this guide, and start exploring the endless possibilities of remote access. And don’t forget to share your experience in the comments below—I’d love to hear how you’re using your Pi remotely.
Conclusion
In conclusion, accessing Pi remotely is not only possible but also incredibly useful. From SSH to VNC and beyond, there are plenty of software options to choose from, each with its own strengths and weaknesses. By following the steps outlined in this guide, you can set up remote access in no time and take your Pi projects to the next level.
Remember, the key to success is experimentation and learning. Don’t be afraid to try new things and push the boundaries of what your Pi can do. And most importantly, have fun! After all, tech is meant to be enjoyed, not just used.
Table of Contents
- Hot Aditi Mistry Videos A Deep Dive Into Her Journey Talent And Viral Moments
- Aditi Mistri Live Videos The Ultimate Guide To Her Phenomenal Rise